Basil is one of the most versatile and aromatic herbs you can grow at home. Whether you’re a seasoned gardener or just starting, having an endless supply of fresh basil leaves can elevate your cooking and add a delightful fragrance to your garden. In this blog post, I’ll share some simple yet effective tips on how to harvest and propagate basil so you can enjoy a continuous supply all year round.
▼Scan @ Video Index▼
- 0:00 – Introduction
- 0:13 – Meet My Basil Plant
- 1:11 – Tip 1: Harvesting with a Sharp Tool
- 1:55 – Tip 2: Propagating Basil Cuttings
- 2:43 – Tip 3: Transplanting into Bigger Pots
- 3:11 – Endless Supply of Basil
- 3:44 – Summary
Meet My Basil Plant
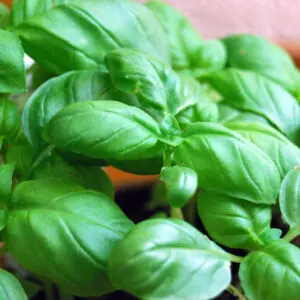
I’m Neil, a plant lover, and I’ve been growing basil for quite some time. The basil plant I’m showcasing today is special. Despite its age (around seven months), it’s still thriving. Interestingly, it never flowered, even during the scorching summer temperatures here in Ahmedabad, where it often reaches above 45°C (113°F). This non-bolting trait has allowed the plant to focus all its energy on producing leaves, making it perfect for continuous harvesting.
Tip 1: Harvesting Basil with a Sharp Tool
The first step to ensuring your basil plant remains healthy after each harvest is to use a sharp tool. I recommend using a sharp paper cutter or gardening shears. A clean, straight cut helps the plant seal its wounds quickly, preventing bacterial infections.
Here’s why this works:
- Healthy Healing: A sharp cut ensures the plant can easily close up the wound, reducing the risk of disease.
- Encourages Growth: Regular harvesting stimulates the plant to grow more leaves, making it bushier and more productive.
Pro Tip: Harvest in the morning for the best results, as the plant is well-hydrated and more resilient.
Tip 2: Propagating Basil Cuttings for an Endless Supply
One of the best things about basil is how easily it propagates. Every time you harvest, you can turn those cuttings into new plants.
Here’s how:
- Choose Healthy Cuttings: Select stems that are at least 4 inches long with a few leaves attached.
- Root in Cocopeat: Place the cuttings in a shallow pot filled with cocopeat. This lightweight, moisture-retentive medium encourages root growth.
- Semi-Shaded Area: Keep the cuttings in a semi-shaded area where they receive morning and evening sun. This helps them establish roots without getting scorched.
After a few weeks, you’ll notice roots forming, and your new basil plants will be ready to transplant into larger pots.
Tip 3: Transplanting Basil into Bigger Pots
Once your basil cuttings have established roots, it’s time to transplant them into bigger pots. This gives them room to grow and ensures they continue producing abundant leaves.
Steps for transplanting:
- Choose a Larger Pot: Ensure the pot is large enough to accommodate the growing roots.
- Use Quality Potting Mix: Fill the pot with a mix of cocopeat and compost for nutrient-rich soil.
- Water Regularly: Keep the soil moist but not waterlogged. Basil loves consistent moisture.
Why These Tips Work
By following these simple tips, you can create a self-sustaining basil garden. Each time you harvest, you’re not only gathering fresh herbs but also planting the next generation of basil plants. This cycle ensures you always have a steady supply of basil, no matter the season.
Final Thoughts
Growing basil is incredibly rewarding, and with the right care, you can enjoy an endless supply of fresh basil leaves. Whether you’re using it for cooking, making pesto, or simply enjoying its aromatic presence in your garden, these tips will help you get the most out of your basil plants.
If you found these tips helpful, don’t forget to share this post with fellow gardening enthusiasts. For more gardening tips and tricks, subscribe to my YouTube channel, plantsmylove.com, and join me on this green journey!
Happy gardening!


